

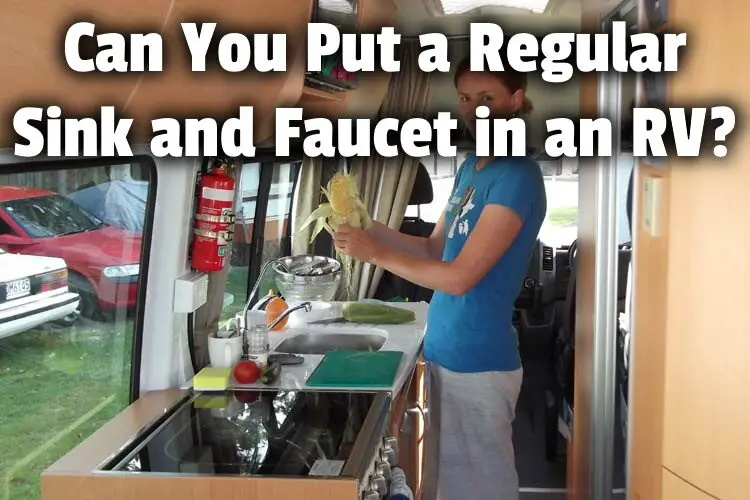
When I first got into touring the country in my RV, I couldn’t help but miss the full-sized kitchen, sinks, shower, and furniture I had at home. Some RVs are larger than others, but can you put a regular sink and faucet in an RV?
As a general rule, it is possible to use regular sinks and faucets in an RV. However, it will require adapters to connect the water faucet to the RV, as the plumbing system in an RV is typically 13/16th compared to home faucets which are either ½” or ⅜” compression fittings.
And any sink, be it a stainless steel sink, solid surface sinks, or acrylic RV sinks can be replaced with a residential version as long as the hole in the counter is compatible with the size of the new sink.
So special adapters are needed to deal with the RV plumbing system, flexible hoses, and making it compatible with regular home faucets.
But it’s totally doable!
Let’s have a closer look at the difference between regular sinks and faucets and those used in RVs, as well as how to install a regular-sized new faucet in an RV.
What is the difference between a regular faucet and an RV faucet?
Most RV faucets have a 13/16th thread and are designed to connect to the RV’s PEX tubing which comes with a threaded fitting directly on the end of the tube. Home faucets, by comparison, may be designed to connect to PEX or copper and will either be ½” or ⅜” compression fittings.
So if you’re trying to put a regular faucet in an RV, be prepared to use an adapter to go to 13/16th from whatever the sink is.
In an RV, the plumbing system is made of smaller parts, and beneath your sink, you will see that water flows into the faucet and out of the sink through flexible rubber/plastic water lines. On the other hand, if you look beneath your sink at home, you will see that the pipes are either rigid metal or PVC.
Therefore, if you want to install a regular faucet and sink in an RV, you will need to get your hands on an adapter kit. An adapter kit allows you to attach faucets and sinks to plumbing systems they are not compatible with.
Luckily you can find faucet adapters online between $10-$20, and they are super easy to install. Sometimes you may find your faucet adapter leaks, but I’ll talk more about how to deal with that issue later in this article.
Installed new kitchen faucet in RV today. Who said girls can’t do plumbing? #girlswhoplumb #aresfarms #militaryfarmgirls pic.twitter.com/jEg2nJb17M
— Ares Farms (@AresFarms) May 29, 2020
Are RV faucets standard size?
As a general rule, most RV faucets are standard to one another being designed for PEX tubing and being a 13/16th thread size. They are typically smaller than home faucets.
Sometimes the sink and faucet in an RV are smaller than a regular one.
This is most common on smaller RVs, which are designed for short journeys. On a smaller RV, you probably won’t need a massive sink and faucet, and a large sink and faucet would look out of place on a small RV with a compact interior.
On the go in your RV? The 4N1 Aqua-System fits in cramped spaces with room to spare.
Who wouldn’t want #instanthotwater, #purifiedwater, and full-flow #tapwater in a single faucet? https://t.co/GuZYl7PEzg#rv #motorhome #rvlife #rvreno #faucet #aquanutech #4n1aquasystem pic.twitter.com/6SyEA8o2eu
— BTI AquaNuTech (@aquanutech) January 17, 2022
Why are RV faucets plastic?
Some low-end RVs that are small come with plastic faucets. This is because plastic faucets are cheaper and easier to make, and they are very lightweight compared to metal faucets.
And these are most common in a budget travel trailer.
If your RV has a plastic faucet, it’s not the end of the world. An old RV faucet made of plastic can easily be replaced with more durable metal faucets or even residential kitchen sink faucets.
I’ll explain how to do that later in this article.
You should seriously consider replacing a plastic faucet with a metal one. That’s because plastic faucets are less durable and even brittle. If you use very hot water in your faucet, this can cause the plastic to expand, and then it will shrink when it cools.
This constant heating and cooling can lead to your RV faucet developing leaks where the pipes join. The leaks can be fixed by installing O-rings and rubber seals at the pipes, and you can also apply Teflon tape around the joints in your plumbing system. However, this is more of a makeshift solution.
This is an area of the RV that we’ve actually never shown before. This is located beside our bed at the very back of the RV, and we’ve made quite a few updates here. We redid the counter and replaced the faucet a few months back, and we recently replaced… https://t.co/s8MDHZpFBQ pic.twitter.com/NdJHaMlPCe
— Life Among Pines ???? (@lifeamongpines) May 11, 2018
How do I replace an RV sink and faucet?
If you want to change an RV sink and faucet, disconnect the water in the RV. Then remove the old plumbing connections and take out the old sink which may have been caulked to the counter. After that, get your new sink and faucet, and connect them before finally turning the water back on and checking for leaks.
Let me break that down for you:
- Turn the water off – it goes without saying, don’t start plumbing work if the water is on. Water will spray all over the place and ruin your RV. If your RV gets wet, the furniture and flooring will get damp, and it will never be completely clean again. It will smell funny too. If not connected to a campground water supply, simply turning off the water pump may suffice.
- Remove the old connections – under your RV bathroom sink or kitchen sink, use a wrench to loosen the connectors that connect the water tubes to the faucet. Some water will drip out, so always do this with a bucket or bowl underneath.
- Take out the old sink and faucet – underneath the sink, there should be a nut used to hold RV kitchen faucets or bathroom faucets in place. Use a wrench to loosen the nut, and then slowly pull out the old faucet. Use equal pressure on all 4 edges of the sink and faucet, and make sure you have a safe space to put the sink when you have taken it out.
- Get ready for the new sink and faucet – most sinks will have a silicone sealant around the sink to prevent leaks. Use a warm, damp cloth to remove this residue. Don’t be tempted to use a scraping tool, as you will damage the surroundings of your sink. Make sure the area is clean and dry before putting the new sink in.
- Connect the water pipes again – after you have carefully lowered the sink and faucet into the space, make sure everything feels secure – there should not be any wiggling around. Then go back under the sink, and connect the pipes again, the same way you removed them. Don’t over-tighten the nuts, as you will strip the threads and have a leaky plumbing system. You want it to be slightly more than finger-tight.
- Test the faucet and sink – finally, turn your water back on, and turn the faucet on. Ensure water is flowing through nicely, and that there are no leaks. Initially, the faucet will spit out air but don’t worry, that’s just the air from the empty pipes being pushed out by the water. If water is not coming out, or if it is coming out really slowly, then the water pressure in your RV could be low.
Check out this recent article on my site, where I give you a guide to troubleshooting the cause of low water pressure in an RV. I’ll also give you some simple solutions to fix the issue.
It turns out that swapping the faucet in an RV isn’t *that* different from doing it in a house. But I made a little video about this weekend’s project in case you’re interested:https://t.co/q2A5vk9eaw pic.twitter.com/6G2mgowmh6
— Heath Racela (@HeathRacela) April 11, 2022
How to use a regular faucet in an RV
To use a regular faucet in an RV, follow the exact same process as above. However, when connecting the faucet to the plumbing system of your RV, ensure you use a faucet adapter.
Faucet adapters are cheap, made of metal, and about the size of your thumb. They usually come with a compression fitting on top. You can screw that off. Then you will be left with a ½-inch to 3/8-inch adapter that you can use to connect the regular faucet to your RV plumbing. The ½-inch side will usually twist into the ½-inch pipe of your RV, and the 3/8-inch side will twist into the regular faucet.
If you notice the faucet leaking at the adapter, you may have tightened it too much, stripping the treads. Turn the water off in your RV, run the faucet, remove the adapter, and check the threads. If the threads are okay, re-install the adapter.
Run the water again, and if it still leaks a little bit, you can apply some Teflon tape. Make sure the adapter and hoses are bone dry before applying the tape, or it won’t adhere.
What is the best RV kitchen faucet?
The best RV kitchen faucet that brings the style and functionality of residential sinks and a higher-end household faucet is the Hi-Arc Bullet Spout Single Lever Handle with a Pull-Down Sprayer by American Brass.
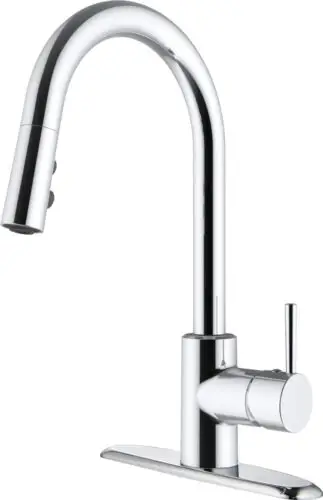
And don’t worry about the name. The color is brushed nickel, so it’s in a modern silver color.
The best price is available through Home Depot or Amazon, so just CLICK HERE to check the current price at Home Depot and either ship to home or arrange to pick it up at the big box store location nearest you.
Or CLICK HERE to check Amazon.
Here are some of the top things people love about this RV kitchen sink faucet:
- The spout rotates 360 degrees
- Compatible with Forest River, Jayco, Grand Design, Winnebago, Keystone RV, and other RV brands
- Comes with hoses for connecting the cold water and hot water line
- Works with a single hole or 3-hole
- The spout extends up 16″
Conclusion
Replacing your RV faucet with a standard kitchen faucet or bathroom faucet is a good idea, as residential faucets and sinks are larger, more durable, and easier to use than those that come in an RV.
To install the faucet, you will likely have to use an adapter.
Always turn your RV water off when changing the faucet. If the faucet or plumbing system is leaking, you may have stripped the threads of one of the connectors. If the leak is big, you need to check the threads and replace the damaged parts.
If the leak is small, I recommend you replace it anyway, but simply using some Teflon tape on the leak will do if you don’t use the sink too much.
Above all, regardless of what sink, faucet, adapters, and plumbing system you use in your RV, the most important thing is to keep everything in good condition.
Photo which requires attribution:
Motorhome cooking by studio tdes is licensed under CC2.0 and was cropped, edited, and had a text overlay added.
Middle Class Dad is a participant in the Amazon Services LLC Associates Program, an affiliate advertising program designed to provide a means for sites to earn advertising fees by advertising and linking to Amazon.com. As an Amazon Associate, I may earn a small commission from qualifying purchases if you click to Amazon from my site and choose to make a purchase. This is no way increases the cost to you.