

Are you ready to take on the camping season? Before hitting the road, it’s important that you de-winterize your travel trailer. To ensure you don’t miss a beat, we’ve created an extensive de-winterize travel trailer checklist:
How to De-winterize Your Travel Trailer:
- Charge and Re-install All Batteries
- Check the Tires. During winter storage, an RV’s tires will lose about two to three psi of air pressure for every month or inactivity. Also, check depth of the tire tread
- Check the Exterior for cracks, broken seals, and exterior lights
- Flush the Freshwater System of All Antifreeze
- Sanitize the Freshwater System
But that’s just a quick glimpse!
So below, we’ll go through all the necessary steps for a safe and successful camping season. From checking propane tanks and water lines to draining plugs and inspecting batteries, our de-winterize travel trailer checklist has got everything covered.
So don’t delay – get started now with these most important steps so you can hit the open road in no time.
Table of Contents:
- De-Winterizing the Exterior of an RV
- De-Winterizing the Propane System of an RV
- De-Winterizing the Freshwater System of an RV
- Check All RV Batteries After Winterization
- FAQs
- Conclusion
De-Winterizing the Exterior of an RV
When de-winterizing your RV for the spring and summer, it’s a good idea to inspect the exterior of your vehicle.
This includes checking for any signs of damage from winter weather or animals that may have nested in the vehicle while not in use. Start by looking over all surfaces of your RV, including windows, walls, roof, and tires.
Check for any cracks or holes that could cause a leak or other issues during travel.
Next, check all tire pressure levels to ensure they are properly inflated and safe to drive on. Tires can deflate during cold temperatures so make sure they are filled with air before hitting the road again.
Inspect each tire individually as well as tread depth – if you notice uneven wear patterns this may indicate an alignment issue which should be addressed prior to driving long distances with your RV.
If you have a spare tire, don’t forget about those also!
Tire covers are a great thing to consider for your RV during the downtime in winter as they can protect your RV’s tires from sun, rain, snow, sleet, and cold. They are surprisingly easy to put on and are fairly inexpensive.
Click that link to read all about them on my site.
To maintain the aesthetic appeal of your RV, use a soft brush such as an old toothbrush and a gentle cleaner like dish soap mixed with warm water to clean off any dirt or debris that has accumulated on its exterior.
Use a gentle cleaner like dish soap mixed with warm water along with a soft brush such as an old toothbrush – avoid using anything abrasive which could scratch paintwork or decals on the side of your trailer. Make sure you rinse off completely after cleaning too so there is no residue left behind.
Gently scrub away any accumulated dirt and debris on the exterior of your RV with a soft brush such as an old toothbrush, taking care not to damage paintwork or decals.
Use a gentle cleaner such as dish soap mixed with warm water along with a soft brush like an old toothbrush – avoid using anything abrasive which could scratch paintwork or decals on the side of your trailer. Make sure to rinse off completely after cleaning so there is no residue left behind.
After thoroughly inspecting the exterior of your RV for any damage or wear and tear, you can now proceed to de-winterize it. Moving on to the propane system of an RV, it is important that all components are properly checked before use.
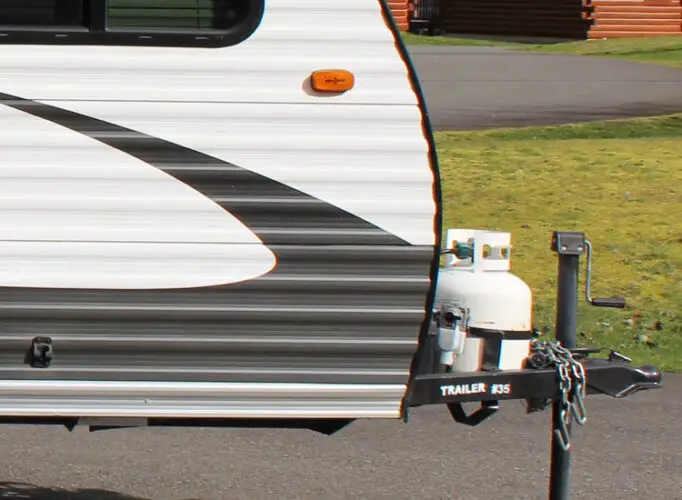
De-Winterizing the Propane System of an RV
Propane systems are essential for many RV owners, providing the fuel needed to power appliances and heaters. After a long winter, it’s important to de-winterize your propane system before you hit the road. Here’s what you need to do:
Check Propane Tanks:
Start by inspecting your propane tanks for any signs of damage or leaks. Ensure all valves are firmly shut and the container is still tightly sealed. Inspect the tanks for any flaws, and if found, get them substituted quickly before reuse.
Test Connections:
Once you have checked the tanks themselves, test all of their connections with a soapy water solution or leak detector spray. This will help identify any potential leaks in the lines between your tank and other components such as hoses or regulators. If there is a leak present, make sure it gets fixed immediately before turning on your propane system again.
Replace Components if Necessary:
In some cases, parts may need to be replaced due to age or wear and tear from being exposed to cold temperatures during winter storage periods. Check things like hoses, regulators, and other components for cracks or tears in order to ensure they can safely hold pressure when used again this season.
Check Gas Lines & Valves:
Lastly, inspect gas lines throughout your RV for any signs of corrosion or blockages which could prevent the proper flow of gas through them when turned on later down the line – literally. Make sure that all valves along these lines are functioning correctly too; otherwise, you might find yourself stuck without hot water until they’re repaired.
Essential measures should be undertaken to de-winterize an RV’s propane system in order to guarantee secure and proficient functioning. Next, we will look at how to properly de-winterize the freshwater system of an RV.
Once you’re done checking, test all LP gas appliances by lighting the burners and ensuring everything is working normally. Your refrigerator also likely runs on propane, so also check to make sure the fridge is starting to get cold.

De-Winterizing the Freshwater System of an RV
De-winterizing the RV water system is a vital step in preparing for your next camping adventure.
The first step in the de-winterizing process is draining and flushing all non-toxic RV antifreeze from the RV’s fresh water tank, system, and RV water lines, including connections to your hot water heater as well as other fixtures.
If you removed the water filter when winterizing, make sure that gets put back in place.
The step-by-step process is:
- Connect your trailer’s water intake to a garden hose (at your house or campground)
- Turn on the water at the spigot
- Turn on every faucet in the camper including the shower (both hot and cold water in case there is lingering antifreeze in the hot water heater tank)
- Let the water run until totally clear
- Turn off the water at the spigot
- Turn on the water pump
- Repeat the procedure to eliminate any antifreeze in the freshwater tank
This process will fill up your holding tanks, so ideally have that connected at a dump station or campground or have a plan to dump it soon.
If you aren’t able to connect to a water source, this process will still work with a full fresh water tank in conjunction with the water pump.
The last step in de-winterizing is checking all valves associated with the freshwater system to ensure they are opened correctly and do not leak when pressurized.
This can be done by turning each valve handle several times clockwise until tight then back off slightly counterclockwise – if done properly these should remain open without having to constantly adjust them manually every time you want fresh water flowing into your RV.
Lastly, test out all faucets and shower (including an outside shower if you have one) within reach to make sure everything is working properly before hitting those dusty trails once more.
To ensure the freshwater system of your RV is de-winterized properly, be sure to follow all steps in this checklist. Moving on, it’s important to check all batteries after winterization for optimal performance and safety.
Check All RV Batteries After Winterization
It is essential to check all RV batteries after winterization.
Verify that the batteries have been adequately charged to guard against destruction or erosion during storage. Connectors should be cleaned and tightened, while battery fluid levels should also be checked and topped off if necessary with distilled water.
If possible, it’s best to use a battery tester/charger like this one on Amazon when checking the voltage of each battery in order to get an accurate reading. Anything lower than 12 volts indicates that the battery needs charging before being put back into service. If your RV has two or more batteries connected together in parallel, they should both read at least 12 volts when tested individually with a multimeter.
That tester is good for regular as well as deep-cycle batteries, lead-acid batteries, as well as both 6-volt, and 12-volt systems.
You can also test for resistance between terminals using an ohmmeter or continuity tester; anything higher than 0 ohms indicates a good connection between terminals and proper electrical flow through the cables connecting them.
Additionally, you may want to inspect the case of each battery for signs of wear such as cracks or bulges which could indicate internal damage due to overcharging or other issues caused by improper maintenance during winterization procedures.
Frequently Asked Questions
What should I remove from the RV for winter?
Before winterizing your RV, it is important to remove all food and perishables.
All water tanks should be drained and cleaned with a bleach solution. Remove any batteries from the RV and store them in a warm location. Cover windows, vents, air conditioners, and other openings with plastic or foam insulation to protect against cold temperatures.
Finally, inspect all hoses for cracks or leaks before storing away until springtime. Taking these steps will ensure your RV is properly winterized and ready for the next camping season.
When should you de-winterize a travel trailer?
It is important to de-winterize a travel trailer as soon as the weather begins to warm up. In Texas where I live, that would be early March. But if you live in Chicago, that may be too soon.
Here’s a handy chart showing the date of the last freeze regionally around the US:
| Region of the US | Avg Date of Last Freeze |
| Mid-Atlantic Region | May 15th |
| Southwest Region | March 16th |
| Midwest Region | May 1st-May 31st |
| West Coast Region | Jan 16th-March 15th |
| Rocky Mountain Region | May 31st (or later) |
(source)
This will help prevent damage from freezing temperatures and ensure that all systems are functioning properly before taking it out on the road. To de-winterize, start by draining any antifreeze or water left in the system, then flush out fresh water until it runs clear.
Next, inspect all hoses and fittings for cracks or other damage and replace them if necessary. Finally, fill with fresh potable water and check for leaks at each connection point. Taking these steps now can save you time and money later.
How do you sanitize a camper water system after de-winterizing?
To sanitize a camper water system after de-winterizing, it is important to first flush the entire system with fresh water.
Add a quarter cup of bleach for every 15 gallons of tank capacity and fill the tank with fresh water, then proceed to turn on all faucets until chlorine is detectable.
Turn on all faucets until you smell chlorine at each outlet, then let sit for 12 hours before draining and refilling with clean potable water. Lastly, run all faucets again to ensure that any remaining traces of bleach have been flushed out completely. Following these steps will help keep your camper’s drinking water safe and free from contaminants.
Do you have to de-winterize an RV?
Yes, IF you added biodegradable antifreeze to your trailer’s freshwater system, de-winterizing an RV is a necessary step before taking it out for the first time in the season.
Now if you live somewhere mild like Florida, adding antifreeze isn’t likely necessary, in which case you may not need to do much of anything.
But for most of us, this process involves flushing antifreeze from the water lines and draining tanks to ensure that all systems are working properly. Inspecting and replacing any components or accessories that may have been harmed during storage should be carried out, if necessary.
Following these steps will help ensure safe travels throughout your camping adventure.
Conclusion
Today we looked at all the crucial things you must do to get your RV ready after having winterized it during the colder months. From batteries to the fresh water system, to interior and exterior checks, we covered it all.
After following this step-by-step guide, you are now ready to enjoy your RV during the camping season.
Before embarking on your journey, ensure that there are no water leaks or other potential issues present in the RV. Ensure all is in good working order to guarantee a secure and delightful excursion with companions and family.
It’s also a good idea to check and maybe replace batteries in a smoke alarm if your trailer has one.
DSC09424 by Adventures On Wheels and IMG_0081 by JBLM MWR is licensed under CC2.0 and may be cropped, edited, and/or had a text overlay added. Still frame taken from video How to Winterize an RV + What Tools & Supplies You Need | RV DIY by RVLove | Marc & Julie Bennett, also licensed under CC2.0 and may be cropped, edited, and/or had a text overlay added.
Middle Class Dad is a participant in the Amazon Services LLC Associates Program, an affiliate advertising program designed to provide a means for sites to earn advertising fees by advertising and linking to Amazon.com. As an Amazon Associate, I may earn a small commission from qualifying purchases if you click to Amazon from my site and choose to make a purchase. This is no way increases the cost to you.