

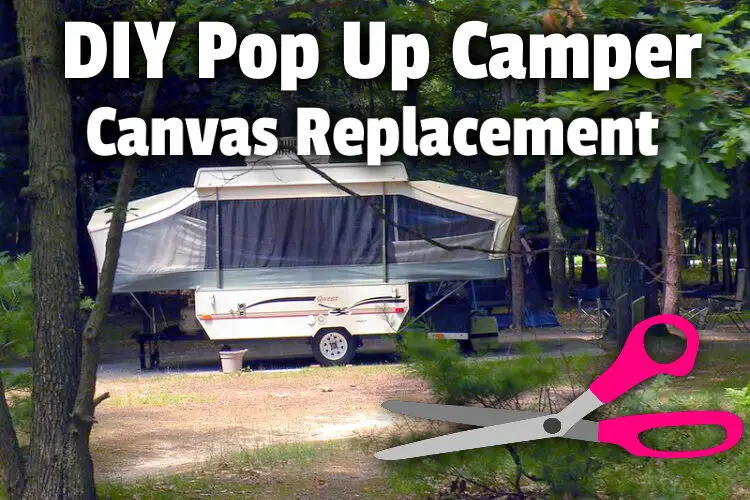
Pop-up campers are great as they give us the convenience of an RV at a budget price. But eventually, the canvas will need to be replaced, which can be costly. So is there a DIY pop up camper canvas replacement?
Camper canvas replacement costs average between $1,200 to $1,500. And it may require mailing in the old one to ensure the new one is properly cut to size. Replacing the canvas involves removing the old one and installing a new one. It’s an easy process requiring no technical know-how.
In this article, we’ll get into whether canvas material is the best choice, the best way to remove the old one, how to deal with a damaged area, and whether it’s worth seeking out a professional recanvasing specialist.
But whether you’re a DIY pro or this is your first time working on a camper’s canvas, we’ve got you covered step-by-step.
Let’s get into it.
Can you replace the canvas on a pop-up camper yourself?
Yes. You can replace the canvas on a pop-up camper yourself. It involves removing the old canvas and easily tucking in the new canvas into the top and bottom tracks of the camper. And using the zippers to connect the different panels afterward.
While removing the old canvas, take note of the position of each panel — where exactly you’re removing it from and which end fits where seeing as you’ll have to replace the panels the same way when you’ve got your new canvas.
To remove the old one, you’ll remove each panel from the top or bottom part of the tracks or grooves they’ve been tucked in. Gently pull the fabric out by sliding it to the side.
In some models, the ends of the fabric on both sides have also been screwed in. Simply use a screwdriver to unscrew. Repeat the process for each panel.
Most replacement canvas parts are sold in four or five separate pieces which can later be attached.
There are two pieces for the slide-out bed areas, two for the door area, and one for the smaller end of the pop-up camper. These different panels have zippers joining them together. Some also have Velcro in a few parts for additional support.
You’ll need to let the canvas replacement company know the model, make, and year of your pop-up canvas. They have patterns for hundreds of models.
But, in some cases, you may be asked to mail in the old canvas. When you have received your new canvas, take each panel and tuck the top part into the tracks. Do the same for the bottom part.
If your camper is a model that uses screws to also keep the fabric attached to the pop up, use a screwdriver to put the screws on. Newer models tend to be easier than an older pop up camper.
The edges of some panels may have Velcro. Pull them so they create a firm connection and use the zippers to join the different panels together. And you’re done; easy DIY project!
this lil pop-up camper is Cute AF!!! ???? pic.twitter.com/FnGh4nfdst
— Coleen (@Coleens_) October 24, 2020
What material do you use for a pop-up camper?
The material for a tent trailer is made of vinyl or canvas or a mix of both. Each material, naturally, has its distinct qualities. Canvas has a classic look, while vinyl gives off more of a space-age appearance.
Canvas is made of cotton and is more natural and rugged, it has a matte appearance and a coarse texture. Vinyl, on the other hand, is glossier.
So it has a bit of a shine. It has a rubber-like texture and is smoother than canvas.
Which is better? It depends on what you like. The most used type of canvas is a little more durable, while vinyl is easier to clean. If a canvas is maintained well — cleaned, dried, and stored where there’s no humidity, it could last for up to 15 years.
As you know, humidity and moisture can sometimes cause mildew to grow.
You’ll need camper canvas repair kits so that you can fix small, damaged areas. And regular maintenance is a good idea to extend the life of your canvas. Small tears or holes in the canvas are a common problem for camper owners.
Be sure to avoid harsh chemicals, but you need a scrub brush and mild soap for cleaning it now and then.
But even with this, in the long run, the day will come when the elements would have done enough damage to your cotton canvas, it might be time to start thinking of repairing the affected parts or replacing the whole with something brand new.
All RVs need to have their roofs resealed from time to time.
But if you’re looking for a new one, you may be surprised at the options. In a recent article, I get into aluminum and rubber roofs and which ones are better for RVs. Then, I explored the pros and cons of each one. I wrapped up the article by considering other materials that RV roofs are made of.
Just click the link to read it on my site.
How hard is it to replace the canvas on a pop-up camper?
It is not hard to replace the canvas of your pop up camper. Replacing a canvas does not require technical know-how. The fact is that if you can hang a curtain, you can replace your canvas.
But it may take you a few hours if you have not done it before.
It is a straightforward process of removing the old canvas and putting in the new one. The fabric is tucked into the tracks or grooves on the top and bottom parts of the camper.
In some cases, screws are also used to keep the fabric attached to the wall of the pop up. In this case, you’ll need a screwdriver to remove them.
There are a few cases where it might be a bit hard to remove the fabric in the first place. Perhaps it’s a very old camper. In that case, you may need to apply Vaseline or use a heat gun (or hairdryer) close to the tracks, and it would be easier to pull the fabric out.
Some models come with pieces made of Velcro that you can easily wrap around the poles to make them look pretty. On the whole, it’s a fairly easy process. We’ll go into more detail in the next section.
Have you ever wondered if you can put kayaks on top of a pop up camper?
Well, you’re in luck because that’s what I get into in a recent article. I looked at how much a kayak weighs and how much weight you can put on top of a camper. But I also revealed whether you could put a roof rack on top of a camper.
Just click the link to read it on my site.
Camper: “Is my pop-up a tent? It has canvas sides.”
Me: “Has wheels and pulls behind you?”
“Yes.”
“Thats a camper.” pic.twitter.com/NSCuB4kT8G— Lóre (@MestizaMetaphor) May 17, 2015
DIY Canvas Replacement Steps
I did a little bit of research to choose some of the best companies that are experts in the sale of camper canvas and professional installation.
Two of the top ones are (1) Canvas Replacements and (2) Bear Creek Canvas.
Now, let’s look at the few steps involved. Note that there could be slight differences because of the particular model you have. There are two key activities: remove the old canvas, and, when you’ve got the new one, replace it.
Remove Old Canvas
- Find where the canvas connects with the walls of your pop up. It is tucked into the channels on the top. Usually, a metal bracket holds the canvas which is secured by clamps. The bracket is what makes the canvas stretched, with two parts pinching it for a tight and secure fit.
- Use a screwdriver to remove the screws on the clamps on the wall of the camper, move the bracket, then, pull the top of the canvas out of the mounting track, then carefully remove the canvas. In fact, once the screws are removed, simply pull the fabric to the side, and it will come off.
- Use vaseline – If it is a bit difficult to remove the fabric. You could apply Vaseline to the track or use a heat blower, and it will come off.
- Remove all canvas fasteners, then slide the canvas out of the bottom mounting track. The bottom panel is easier to remove because its edge is often a hem with a lip that’s made it easy to slide it into the mounting track. If the edges of the track are curled, to keep the fabric in place, simply use a flathead screwdriver to pry it open and pull out the fabric.
- Carefully cut or remove the wiring. In some models, there’s a section in one of the panels that’s made out to look like a small hose. The electric wires pass through it. You want to note this. Cut the wires, so that you can easily remove the panel. Then, later, you can rejoin the wires after you’ve changed the panel.
- Fold each panel carefully and put it in a box.
- Then, mail it to the canvas replacement company if that is a requirement.
Replace New Canvas
- Unzip the different panels of the canvas for easy installation.
- Take the upper edge (usually made of plastic) of the canvas where you find the supporting rods. The supporting rod is a piece of rubber tubing that is sewn onto the canvas.
- Push in or press in the supporting rods into the metal channel/track. It would easily fit into the track.
- Tuck in the edge of the canvas (a flat head screwdriver can be used). Do this from corner to corner and top to bottom for all the different parts (bed and door areas) that make up the whole canvas.
- Does yours use screws? Some models have screw holes too. If yours does, secure it with screws. Use a screwdriver to secure the canvas to the hard side of the pop up. This makes the fabric doubly secure.
- Pass the electric wires through the hose-like slot and reconnect it.
- Tuck in the canvas across both sides of the door area.
- Use the zippers and Velcro to connect the different sections together. This is when the whole canvas comes together as one whole.
- Check every part to ensure they are well-connected together so that water cannot leak into your camper.
Conclusion
In the article, we looked at whether you can replace the canvas on your pop up yourself and what material you use for a pop up camper. Then, we looked at how hard it is to do it yourself.
Lastly, we wrapped things up by considering the steps involved in doing the replacement.
Image by Clker-Free-Vector-Images from Pixabay and Pop-Up Camper by Mike Goad is licensed under Public Domain and was cropped, edited, and had a text and graphic overlay added.