

With all the traveling RV owners do, sometimes it may be difficult to remodel your camper with a tight budget. After all, there are so many things that you need to be comfortable in your RV. This led me to question, how do you do a camper remodel on a budget?
To do a camper remodel on a budget, look for used parts, appliances, or accessories on platforms such as Ebay. Additionally, some RV owners will sell inoperable RVs for parts for low prices. Then plan to DIY most of the work to save on labor and installation costs.
Let’s have a closer look at what you should be paying attention to when you are remodeling your RV. I’ll also give you some extra tips that will save you time and money in the process.
Step 1: Decide what your budget is going to be
I recommend that you inspect your RV before deciding on a budget. There is nothing worse than setting a budget only to realize that your remodel is never going to work because you missed a key detail.
You have to thoroughly inspect your RV for water damage, mold, mildew, electrical issues, and issues with the appliances. Once you are happy that the RV is structurally sound and everything is working, look at the walls, flooring, and cabinets.
The furniture and additional comforts in the RV should be your last priority since they don’t actually make the RV more functional or safer to use. Besides, furniture is super easy to repair and recondition.
If you have a used RV, that is not an issue. You can try and get in contact with the previous owner of the used camper and ask them about what issues they had with the camper. This will be a great way to kickstart your camper troubleshooting process.
If your camper is not in great condition, you may have to spend a lot of money on it. camper remodel projects can get expensive. So before getting to work on your camper trailer, factor in additional costs that may pop up during your project.
If you have things that need replacing, your budget will need to be higher. If you just need to repair and refurbish things, then you can settle for a lower budget.
Step 2: Decide what you are going to do first
Now that you know what you are going to do to your RV, it is time to make a list of what order you will do them in. There is no point in installing a new floor if you are then going to drag old furniture out of the RV, scratching it.
There is no point in installing an air conditioner when you don’t even have running water in the RV yet. The second stage of remodeling your camper is to set priorities.
As a general rule, the first things you should prioritize are health and safety issues. These will have the biggest impact on your enjoyment inside the camper trailer.
The first thing you should do is inspect the outside of your RV. This is where you will notice the beginnings of water damage. Look for cracks and leaks in the siding and frame of the RV. You may have to replace the frame or siding or repair it.
Selecting the right siding is of paramount importance.
In this recent article on my site, I talk about the difference between aluminum and fiberglass siding for RVs. I talk about the pros and cons of both and which one is more weather-resistant and will protect your RV better.
Just click that link to read it on my site.
After inspecting the outside of the RV for damage, move on to the water and electrical systems. Make sure that there are no leaks in pipes and that the hot water heater is working. You should look for frayed wires and damage to lighting fixtures.
You can then move on to looking at the RV kitchen. Is there damage to the cabinets or appliances? Make sure that the kitchen cabinets and kitchen countertops are installed correctly and not loose. Also, check for mold and insects, especially if the RV is second-hand.
You should decide whether you need new flooring in the RV too. Look for stains and cracks on the floor, and ensure that it is level. If the flooring in the RV is not level, or if there are bubbles on the flooring, it could indicate water damage or rot.
Finally, make sure that the coats of paint are in good condition too. If the paint is cracked, it could be inhaled. And that’s not safe. If you have damaged paint, you are going to have to remove it and re-apply new coats of paint.
So, to sum up, the order of work for your RV renovation should be as follows:
- Start off with health and safety issues
- Repair the outside of the RV
- Check the water and electrical systems
- Check the furniture
- Check the flooring of the RV
- Check the paint
- Check everything else (appliances, furniture, etc)
Celebrating Pride month by launching headfirst into our RV remodel. Very Gay of us.#pride pic.twitter.com/gYJOuD3rMA
— Kailey (@kaileyand) June 2, 2021
Step 3: Remove what you don’t want or need
Now that you know the order of the work you are going to do, remove what you don’t need. If there is damaged flooring, remove it. Sand off damaged paint. If there is mold, remove it. Also, if there are things that you want to keep that will get in the way of your project, remove them for now.
So, remove things like tables and chairs if you plan to lay a new floor. This will make your work much easier and more efficient.
If you are removing things from the RV that are a little heavy and large, like a dining table, have a helper.
For large items of furniture, like bunk beds, you might find it easier to disassemble them to remove them.
Step 4: Repair damage
Now that your RV is ready for work, start on the major repairs, such as water damage. If you don’t know how to repair things like the plumbing or electrical systems in your RV, you can hire someone. However, this is going to be expensive, and you might not be able to afford it on a budget.
Fortunately, most of the plumbing in your RV is quite simple, as is the electrical system.
After you have done the major repairs, you can start repairing furniture and things.
To repair things like cabinet doors, just head to your local hardware store to find things like glue, hinges, and screws. If your furniture is damaged beyond repair, you can get some more from a place like Home Depot for a great price.
My top tip for an RV makeover is to get new furniture off Facebook marketplace. You will find a lot of secondhand things on there. It is by far the easiest way to save money on a project like this.
If you have kids, renovating your furniture can be a great, fun project. You don’t need much money to do it, and it teaches them to be resourceful.
Keeping kids entertained when traveling can be super difficult!
You can check out this recent article on my site where I talk about 35 great ways you can keep your kids entertained when out in your RV.
Just click that link to read it on my site.
Here are a couple before & after’s of the travel trailer remodel. We still need new flooring, and dinette cushions but all the painting is done. #rv #renovation #painting pic.twitter.com/keCSPnXZov
— Nugget & Karalyn (@nuggetsdrooling) November 3, 2020
Step 5: Paint the walls and ceilings
Before you start installing floors and appliances, you need to do the dirty work first. Paint the walls and ceilings. If you install flooring first, you will get paint splashes all over it, no matter how hard you try to be clean and tidy.
Paint the ceilings first, as you will get paint splashes on the walls. And then you can clean them off. I also recommend that you put a dust sheet on the floor, as this will prevent the ground from getting paint on it.
For small spaces, I recommend that you use white paint. This is because white paint gives a spacy feel to the room. It makes the room feel much more expansive than it actually is. If your RV has a high roof, then you could paint the roof a darker color than the walls.
This will make the ceiling feel lower and make the interior of the RV much cozier.
On the other hand, if you have a low ceiling or a short wall in the RV, you should paint it a light color. This will make that short side, or the low ceiling, feel like it is further away.
Paint is a very interesting tool and can give the RV a completely different feeling depending on how you use it.
When selecting an RV paint, bear in mind that there are different paint finishes. Some paints are designed to give a matte finish, while some are designed to give a silk finish. I recommend that you use paint with a silk finish. This is because these paints are easier to clean.
Also, use paint that is designed for bathrooms and kitchens. This is because these paints won’t become discolored or stained by water and steam. So even if you are not going to be cooking in there, this is the best option.
If you want a super smooth finish to the paint job in your RV, then use a paint sprayer. These devices will apply a super-even layer of paint to the wall of your RV. They are a little expensive, but you can hire one for the day if you don’t want to buy one.
If you spray paint onto the wall, you won’t have any brush marks inside the RV.
If you want, you could use wallpaper. I wouldn’t recommend this because paint is simply easier to apply and maintain. If you do use wallpaper, you could make use of a wallpaper border to give walls more proportion.
If you do use wallpaper, I recommend that you use a plain wallpaper that you can paint over.
Step 6: Refurbish the flooring
For the next stage in your camper renovation, it would be a good idea to sort out the flooring in the camper. The floor of the camper is probably the most overlooked thing in RV renovation. Installing a high-quality floor or repairing the current floor can truly bring life to your camper.
If you are on a budget, my top tip would be to use vinyl floor tiles. These don’t cost much money and can make your camper look great. Vinyl floor tiles are good in places where you need to cover a lot of square feet.
It would cost a lot of money to install a hard floor in a large camper. Therefore, you can use vinyl tiles in large spaces, like the living room and master bedroom of the RV. This will help you save a little bit of money when renovating your old RV.
Even though the floor might look okay right now, chances are beneath the tiles, carpet, or other flooring, there is damage. An old camper won’t be in great shape. So, before you start installing a new floor in your RV remodel project, check that it is okay.
Look for water damage and look for damage in the underlay.
What a difference paint and new cushions make!
Are you planning an RV remodel this year?#yyc #rvrepair #camping #explorealberta #wildmountainrv #getoutside #campingtip pic.twitter.com/S7GAnCjXsu
— Wild Mountain RV (@WildMountainRV) March 30, 2022
Step 7: Refurbish the furniture
The furniture in your camper is what brings everything together. If you select the right furniture, it can make the camper look amazing. If you have old, worn-out furniture, the best thing you can do is refurbish it yourself. It is not as hard as it might sound.
For large, expensive pieces of furniture, such as the kitchen table, your best option is refurbishing. Replacing furniture like that would be expensive. And you will have to pay for shipping and other costs too.
For wooden furniture, inspect the surface finishes. If there is damage to the surface finish, sand it off and then reapply a new coat. Or use multiple coats if required. For furniture used for food, such as worktops, and tables, make sure you apply a waterproof varnish to them. This will protect the wood.
For other things, like regular cupboards and cabinets, a fresh coat of paint should do the trick. Once you have completed the re-application of paint and surface finishes, you can do other things. For example, add new hinges and handles to the furniture.
An easy way to make your RV look great is to have similar color schemes throughout. Don’t have a different color scheme in the living room, which is different from the master bedroom.
If you are not able to refurbish the furniture in your RV, then you can buy new furniture. The best place to look is Facebook marketplace and other secondhand sites. Sometimes you will find things that are being given away for free!
If not, you could shop at a cheap furniture store like IKEA. But bear in mind, the things you get here are not going to be RV-suitable furniture.
You may be wondering what the difference between RV and regular furniture is.
In this recent article on my site, I talk all about those differences. I talk about how RV furniture is a different size and has different functions and designs than regular furniture. I also gave tips on how to save money by using regular furniture in your RV.
Just click that link to read the article on my site.
Step 8: Refurbish and replace appliances
What is equally important as the furniture is the appliances in your RV. If you don’t have a working hot water heater and a working faucet, your RV is not going to be comfortable to live in. So ensuring that everything works safely and efficiently is super important.
Start with the water system of your RV. Make sure that your water pipes are not leaking and that they are not frozen. After that, run the faucets in the RV, as well as the shower. If there is something not working, then sort that out first.
After that, make sure that the cooking appliances are working. Test the stoves first since that is what you do most of the cooking with. Then you can check other things like the microwave, refrigerator, and freezer.
Selecting the best appliances for your RV is a very difficult task.
In this recent article on my site, I talk about the most popular brands in RV appliances. I compare them head-to-head and help you decide which ones are the best to go with.
Just click that link to read the article on my site.
If you have an older rig, you will need to make sure that the gas system is working. If you notice that there is not enough gas coming in, or too much gas, then you need to check the propane regulator. Look for rust, damage, and other wear and tear to the device.
If it is damaged, replace it. A faulty propane regulator affects almost all appliances. You won’t be able to use your hot water heater, shower, or cooking appliances if that does not work. They are quite cheap to replace too.
Before and after of my rv bedroom remodel. pic.twitter.com/8geW2vntYW
— Rose (@theglitzyhippi) August 14, 2022
Step 9: Decorate the camper
Now that everything is repaired, replaced, and refurbished, it is time to make the camper yours. Decorate the camper with the finishing touches you want. In the kitchen area, for example, you could install contact paper or stick subway tiles in there.
These tiles can be used to keep the walls safe from backsplash when you are using the sink. Stick tiles are super easy to install because they come with adhesive on the back. They are quite durable and will stay on the wall for many years if you install them right.
You should also decorate the living room during your travel trailer remodel. After all, this is the place where you will spend most of your waking hours.
You don’t need to go crazy, but simply adding something like throw pillows can make the couches look great.
Another overlooked aspect of camper decoration is the lighting. You can just use a light bulb, but if you are willing to pay for the extra cost, a nice, fancy light in the living room would be nice. Lighting goes a long way in making your camper a cozy place to be.
You can get different lighting options at different price ranges. You don’t need to go crazy. Even just getting a nice lampshade can make a small area like a camper’s interior look great.
Step 10: Re-install everything into the camper
If you have removed anything like couches, tables, chairs, and beds, now is the time to put everything back in. You don’t want large things getting in the way of your work, so it is best to remove them when doing jobs like painting.
But when the risk of furniture and appliances getting damaged and dirty is gone, you can put them back in. You don’t necessarily have to put things back where you found them. Now is a great time to experiment with placing the furniture in different places.
You may find that a certain furniture configuration looks better in your camper or is more practical.
It is super important that you remember to anchor things to the ground. If you don’t do this, furniture will slide and tumble around the camper when you are driving. This can cause expensive damage and can be very dangerous.
This is another reason why I recommend you only use RV furniture in your RV and not regular furniture. Regular household furniture is heavy and not designed to be anchored down.
RV update: due to floor rot, was pushed to rip out the lower kitchen. Pulling up the rest of the rotten floor boards today, and replacing those. This gives us an opportunity to reconfigure the kitchen layout a little bit to make more usable counter space. #rv #remodel #renovation pic.twitter.com/9z7U1Od5vG
— Kailey (@kaileyand) June 9, 2021
Additional tips when renovating your camper
Make sure that you don’t buy more materials than you need. It is wasteful to buy 300 square feet worth of flooring when you only have a 60 square foot space to cover. This will save you a lot of money.
To reduce the total cost, you can deliberately leave the camper unfinished. Some people like a vintage camper with a rustic look.
Another way you can save money is by hiring tools for the day instead of buying them. Power tools, such as paint sprayers, can cost hundreds of dollars. And if you only need it for a couple of hours, you will be wasting money.
Always have a financial buffer when renovating your RV. The last thing you want is an unexpected cost to be the only thing preventing you from completing your project.
Remember to select the appropriate furniture for your camper too. You are not going to buy a bunk bed if you have a pop-up camper. Ensure everything that you buy will fit in the camper before you buy it. And make sure that you will be able to get the furniture in through the door.
Conclusion
If you have a new RV that is secondhand, renovating it can be a long, expensive task. But it doesn’t need to be. If you follow this step-by-step guide, you will be able to renovate the camper nice and easy.
The first step to renovating your camper is to decide on a budget and determine the order and priorities of work. After that, you can remove the old things you don’t need and repair damage to the RV.
Next, paint the walls and ceilings, and install new floors. Once the dirty work is done, you can refurbish furniture and appliances and install them back into the RV.
If you follow all the steps in this guide, you will have a super nice camper that you can enjoy your road trips in!
You may be wondering how you can use your RV in the winter.
In this recent article on my site, I talk all about how you can winterize your RV. I go over how to prevent your water pipes from freezing, and I explain how to keep your RV in good working condition even in sub-zero temperatures.
Just click that link to read it on my site.
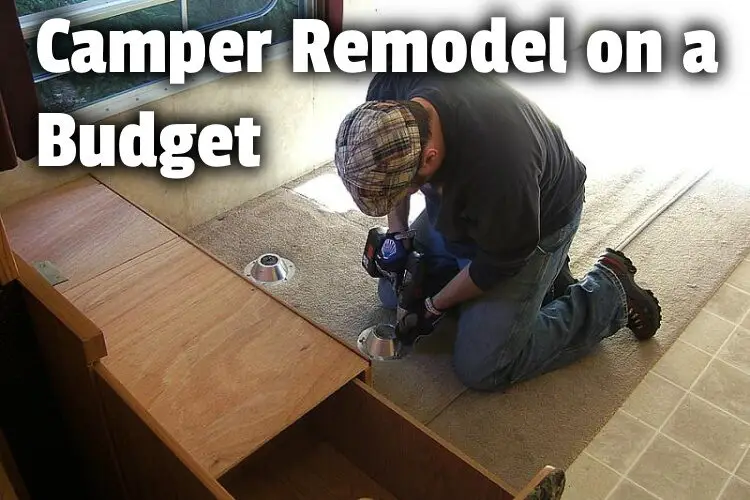
Removing the dining table leg holders by j2davis2005 is licensed under CC2.0 and was cropped, edited, and had a text overlay added.