

Upgrading tile in an RV has become a popular choice for those looking to add a touch of luxury and personalization to their campers. But there are a lot of dos and don’ts about using real tile in an RV.
Real tile can be used in RVs, but the weight of the tiles, durability, and how they will hold up to the movement from driving are factors to consider. Peel and stick tiles can offer beauty and flexibility while also being lightweight.
Check with the manufacturer about warranty coverage before making any modifications to the RV’s interior.
In this article, we will explore different aspects of tiling your RV – from choosing the best type for your needs to understanding the weight implications. We’ll discuss how tiled surfaces can enhance your RV bathroom or kitchen backsplash while considering factors like durability and maintenance requirements.
You’ll also learn about proper installation techniques when mounting tiles on various surfaces within your motorhome. Additionally, we will provide recommendations for selecting the ideal floor tile, backsplash tile options for kitchens, and suitable choices for bathrooms.
Finally, you’ll discover essential tips on grouting and sealing your newly installed tiles in your RV.
Table of Contents:
- Does Real Tile Add Too Much Weight in an RV?
- What Is the Best Type of Tile for an RV?
- What are the Pros of Real Tile in RVs?
- What are the Cons of Real Tile in RVs?
- What Type of Surface Should I Mount Tiles To in an RV?
- The Best RV Floor Tile
- Best Backsplash Tile for RV Kitchens
- Best Tiles for RV Bathrooms
- Finishing Touches: Grouting and Sealing Your Tiles
- Installing Real Tile in an RV: A Step-by-Step Guide
- FAQs
- Conclusion
Does Real Tile Add Too Much Weight in an RV?
A large number of heavy tiles can cause an increase in fuel costs in an RV. Generally speaking, ceramic tile or glass tiles are usually too heavy for use in RVs and should be avoided.
But for a small area, they can be used without too many issues.
Fortunately, there are several lightweight options available that will add style without compromising safety or increasing fuel costs. Porcelain tiles can be a great pick, boasting a range of shades and designs while still being light enough to install in an RV.
Vinyl flooring is another great option that offers durability and ease of installation without added weight concerns. And vinyl will be a lot more durable than laminate flooring.
The surface you mount your tile on can also affect how much extra weight you’re adding to your vehicle.
If possible, choose materials like particleboard or plywood instead of heavier concrete backer board which could add unnecessary bulk to your rig. Additionally, installing with adhesive instead of mortar will help keep things lightweight since mortar requires more material than adhesives do for installation purposes.
To complete the installation and avoid any extra heft, seal grout lines with silicone caulk to protect against moisture damage and make cleaning easier. Doing so prevents dirt from getting stuck between tiles while still avoiding additional weight from products such as epoxy grouts.
With proper attention to detail, you can add a touch of style without compromising your RV’s performance.
Real tile can be a great addition to an RV, but it is important to consider the added weight before making this decision. Now, let’s ponder what sort of tile would be optimal for an RV.
What Is the Best Type of Tile for an RV?
For an RV, peel-and-stick Smart Tiles like these on Amazon, are the most suitable type of tile to use. They offer a number of advantages over traditional glass tiles that make them ideal for use in RVs.
Smart Tiles are made with a translucent gel called Gel-OTM which makes them lightweight and flexible yet strong enough to hold up against wear and tear from frequent use. They are an easy way to add beauty to your RV.
This makes them much easier to install than heavier glass tiles as they don’t require any special tools or techniques for installation like grouting or sealing, saving you time and money on installation costs. Additionally, Smart Tiles can be easily removed if needed without leaving behind any residue or damaging the surface underneath.
Another advantage of using Smart Tiles in an RV is their durability; they won’t crack or chip when exposed to extreme temperatures like glass tiles, which would make them ideal for both hot and cold climates alike.
Plus, because they are designed specifically for use in RVs, they come pre-cut into small sizes that fit perfectly into tight spaces where regular-sized tiles wouldn’t work well such as around windowsills or kitchen cabinets.
Smart Tiles offer a cost-effective alternative to other tile materials due to their lightweight composition and ability to be produced in bulk quickly, making them an attractive option for RV owners.
Their pre-cut sizes make them perfect for tight spaces such as windowsills or kitchen cabinets while their durability ensures they won’t crack or chip even when exposed to extreme temperatures.
Moreover, installation is a breeze since no grouting or sealing is required – saving time and money – and they can easily be removed without leaving behind any residue or damaging the surface underneath. Smart Tiles are a great selection for RV proprietors in search of cost-effective yet dependable tiling solutions.
Overall, if you’re looking for the perfect type of tile material for your RV then look no further than peel-and-stick Smart Tiles. You will save time during installation as well as money while still getting a beautiful finished product that looks just like real stone.
Real tile is a great choice for an RV, as it offers durability and style. Considering the pros and cons of using real tiles in RVs, let’s examine their advantages. Let’s take a look at the advantages that come with using real tiles in RVs next.
What are the Pros of Real Tile in RVs?
Real tile is an ideal selection for RV proprietors who desire to give their interior a more attractive and pleasing look. It’s durable, stylish, low-maintenance, slip-resistant, and can last for years if installed correctly. Plus, it adds a touch of sophistication that many RVers find appealing.
Durability:
Real tile is incredibly durable and can withstand all kinds of wear and tear without showing signs of age or damage. The tiles are also waterproof which makes them perfect for areas where moisture may be present such as bathrooms or kitchens. They won’t warp or crack due to extreme temperatures either so you don’t have to worry about replacing them anytime soon.
Tile offerings range from a multitude of hues, designs, dimensions, and textures to enable you to tailor your RV’s look according to your personal taste. From classic subway tiles to colorful mosaic designs – there are plenty of options available that will fit any budget or aesthetic preference.
Low Maintenance:
Once installed properly with grout sealer real tile requires minimal maintenance beyond regular cleaning with mild soap and water solution every few months. This means less time spent on upkeep which gives you more time to enjoy the open road.
Slip Resistant:
Most types of real tile come with textured surfaces that make them slip resistant even when wet – an important feature in an RV since spills often occur inside while traveling down the highway. Additionally, they won’t absorb odors like some other materials might making them ideal for those who plan on cooking in their RVs frequently.
Overall, real tile offers numerous benefits that make it an attractive choice for RV owners looking to add some flair and functionality to their vehicles without breaking the bank or spending too much time on maintenance afterward.
Real tile is resilient, chic, easy to care for, and has a non-slippery surface that can remain intact for extended periods when correctly put in. Plus, it adds a touch of sophistication that many RVers find appealing.
Real tile in RVs can provide a beautiful, durable finish that is easy to maintain and keep clean. However, the installation process of real tile requires careful planning and consideration before committing to it as an option for your RV.
Next, we will look at what are the cons of using real tile in RVs.
Can you believe this beautiful bathroom is in an RV? The dark tile flooring is amazing ????
Photos + RV reno by https://t.co/89MBoNYMf0#rvbathroom #bathroom #bathroomremodel #bathroomrenovation #lovethatrv pic.twitter.com/bRLQ3LGkqG
— Love That RV (@lovethatrv) April 16, 2022
What are the Cons of Real Tile in RVs?
One of the biggest cons of using real tile in RVs is the extra weight it adds.
Relying on the variety and magnitude of tiles utilized, this can easily sum up to a considerable weight. This additional weight puts a strain on your RV’s suspension system, making it more difficult to maneuver and increasing fuel consumption.
Additionally, because an RV is constantly moving when you’re traveling, there’s a chance that tiles could crack or come loose due to vibrations from bumps in the road. This would require costly repairs to fix and may even void any warranties you have on your vehicle.
Installing real tile in an RV necessitates the purchase of specialized tools and materials, such as grout saws, diamond hole saws, epoxy grouts, and sealers; these can be costly if not already owned. Furthermore, laying down tile correctly takes skill; unless you have experience with tiling projects (or are willing to learn), it’s best left to professionals who know what they’re doing.
Overall, real tile can be a great addition to an RV but there are some cons that should be considered before installing it. Moving on, the type of surface you mount your tiles to is important for ensuring proper installation and longevity of your tiles.
What Type of Surface Should I Mount Tiles To in an RV?
When it comes to affixing tiles in an RV, the surface you pick can have a great impact.
Plywood is a great choice for walls and floors because it’s strong enough to hold up tile without sagging or warping. For walls, go with at least 1/2″ thick plywood for extra stability. Waterproof Easy Installation Backer Board, would be even better since it will make the walls lighter.
Floors should be at least 3/4″ thick plywood with sufficient framing underneath so they don’t sag or deflect when stepped on.
For extra protection against water damage, seal any wood surfaces before installing tiles with a waterproofing sealant like Titebond III Ultimate Wood Glue or Liquid Nails Subfloor & Deck Construction Adhesive on Amazon.
This will help protect against moisture seeping through grout lines and causing mold growth beneath the tiles over time. It’s also important to consider how much weight your RV can handle when selecting materials—heavy stone tiles may not be suitable for lightweight RVs.
When it comes to tiling an RV bathroom floor, ceramic and porcelain are two popular options due to their durability and slip resistance—and there are plenty of designs available these days from classic marble looks to more modern geometric patterns.
If you’re looking for something more unique than traditional tile, cork is another great option: its soft texture makes it comfortable underfoot while still providing excellent water resistance properties.
Vinyl flooring is also becoming increasingly popular in RVs due to its affordability and ease of installation (it doesn’t require grouting). Just make sure whatever material you choose has a low VOC rating so fumes won’t build up inside your vehicle over time.
Installing tiles in an RV can be a great way to give your motorhome a new aesthetic and comfortable atmosphere. The best RV floor tile is one that offers durability, ease of installation, and long-lasting beauty.
With this knowledge in mind, let’s explore what types of surfaces are suitable for mounting tiles in an RV.
The Best RV Floor Tile
Porcelain tile is a good RV flooring option for a variety of reasons.
It has a similar surface texture to natural materials like stone and wood, while being waterproof and incredibly sturdy. This makes it an ideal choice for RV owners who want beauty with durability. Porcelain tile also offers several design options, allowing you to customize your space in any way you choose.
Vinyl plank flooring is another great option for RVs because it’s easy to install, highly durable, and cost-effective compared to other types of flooring. It’s also lighter-weight, easy to install, and flexible (great for a moving vehicle).
Vinyl plank can be found in various colors and styles that mimic the look of real wood or stone floors without breaking the bank. Plus, vinyl planks are water resistant so they won’t warp or rot if exposed to moisture over time—a major plus when dealing with potential leaks from plumbing fixtures inside an RV.
Vinyl plank tiles will also be much easier to install than vinyl sheet flooring.
CLICK HERE to see the top-selling brand of waterproof, interlocking (no glue or screws) vinyl plank flooring on Amazon. 8 colors to choose from.
When installing either porcelain tiles or vinyl planks in an RV, make sure that you use high-quality adhesives designed specifically for this purpose.
These products will help ensure that your tiles stay securely attached even when exposed to temperature fluctuations and vibrations caused by travel on rough roads. Additionally, always double-check your measurements before beginning installation as cutting mistakes can lead to costly repairs down the road.
Finally, grouting between each tile helps protect against dirt buildup as well as adds extra stability and support during transit on bumpy roads – an important consideration since most RVs don’t have subfloors installed beneath them.
A quality sealant should also be applied after installation which helps prevent staining from spills or liquids getting underneath the tiles over time. With proper care and maintenance, these types of floors can last many years so long as they are given the necessary attention throughout their lifespan.
The best RV floor tile is a great way to add style and comfort to your recreational vehicle. Moving on, let’s take a look at the best tile for an RV kitchen backsplash – an important element of any camping kitchen.
Best Backsplash Tile for RV Kitchens
When it comes to an RV backsplash in a kitchen, white hexagon tiles are an excellent choice for creating a warm and natural atmosphere. These classic tiles offer the perfect combination of style and affordability that make them ideal for budget-conscious campers. Plus, they’re easy to install, so you can get your kitchen looking great in no time.
For those who want a quick and simple installation process, peel-and-stick tiles are the way to go.
Peel-and-stick Smart Tiles like these on Amazon come with adhesive backing already applied – all you have to do is press them onto your wall or countertop surface. This type of tile is also lightweight, making it easier on your RV’s frame when compared with heavier materials like ceramic or porcelain tile.
Before starting the tiling process, ensure that the surface you’re mounting the tile onto is even and clean.
For traditional tile, although mastic adhesives may seem like a more convenient option due to their simplicity of application, thin-set mortar offers superior adhesive strength which will guarantee your new backsplash’s longevity.
Moreover, opt for epoxy grout instead of traditional cement grout as it won’t fracture or discolor from water exposure over time like its counterpart can.
With these tips in mind, having beautiful real tile accents in your camper’s interior décor is totally achievable without breaking the bank or putting too much strain on its frame structure along the way.
Having the right backsplash tile for your RV kitchen can help to make it feel like home and provide a nice aesthetic. Moving on, we’ll look at what type of tiles are best suited for bathrooms in RVs.
Best Tiles for RV Bathrooms
When it comes to tiling an RV bathroom, there are a few key considerations.
First and foremost, you’ll want something lightweight that won’t add too much weight to the vehicle. Second, you need something durable enough to withstand constant use and cleaning while on the road. Third, you want something attractive that will enhance your interior design. And lastly, but not least important – ease of installation.
One tile type that ticks all these boxes is penny round tiles with mosaic backing like our Grey Pearl Penny Recycled Glass Mosaic Tile from Amazon.
This particular tile has a slip-resistant surface which makes it ideal for shower floors as well as walls in your camper or motorhome bathroom. The small size of the penny rounds also helps keep the overall weight down compared to larger format tiles such as subway or hexagon styles.
Moreover, these penny rounds boast an attractive aesthetic and come in a variety of shades to suit any desired design.
The recycled glass material used for this tile is strong yet flexible which makes them perfect for areas where movement can occur due to traveling over bumpy roads or uneven terrain; no cracking here. They are also easy to clean with just a damp cloth making them ideal for bathrooms where hygiene is paramount – especially when camping with kids.
In terms of installation, penny round tiles are relatively simple since they don’t require any cutting during application, unlike other shapes such as subway or hexagon tiles (which do require some precision). As long as your surface area is level before laying down any adhesive then installing these little gems should be straightforward even if you’re new to tiling projects altogether.
Overall, if you’re looking for an attractive yet lightweight tile option that’s easy to clean and install, then penny-round mosaic tiles might be just what your RV bathroom needs.
They come in an array of colors to allow you to create the perfect look for your RV bathroom.
The recycled glass material used is strong yet flexible which makes them perfect for areas where movement can occur due to traveling over bumpy roads or uneven terrain; no cracking here.
Plus they are simple to install since they don’t require any cutting during application unlike other shapes such as subway or hexagon tiles (which do require some precision). With all these benefits, penny-round mosaic tiles make a great choice for RV bathrooms.
The best tiles for RV bathrooms should be durable, easy to clean and maintain, and aesthetically pleasing. Properly grouting and sealing your tiles is essential for ensuring their durability and longevity.
Finishing Touches: Grouting and Sealing Your Tiles
Once you have laid your tile, the next step is to grout and seal it (unless you went with the peel-and-stick).
Grouting helps fill in any gaps between tiles, giving them a finished look and preventing dirt or debris from getting into those spaces. Sealing your tile will help protect it from water damage and staining, making it last longer.
For ceramic or stone tiles, acquire the appropriate grout for your specific tile type; there are various options available. You’ll also want to make sure that the color of your grout matches with that of the tile itself so that everything looks cohesive when finished.
Once you’ve got all these materials together, start by mixing up some of the grout according to package instructions until it has a thick consistency like peanut butter.
Next, spread this mixture over each gap between tiles using a rubber float or trowel – whichever works best for you.
Ensure that you firmly press the mixture into every gap, but be gentle; let it sit for 15 minutes before wiping away any excess with a damp cloth or sponge. Finally use an old toothbrush (or similar tool) to get into tight corners where larger tools can’t reach and make sure everything looks perfect before moving on to sealing.
When sealing your newly-grouted tiles, be sure to choose one suitable for whatever type they are made out of (ceramic/stone) and also one which offers protection against stains such as grease splatter from cooking in an RV kitchen area.
Many products come pre-mixed, but if not, mix according to the directions given on the package label first then apply liberally over the entire surface using either a brush roller applicator provided or a spray bottle.
Just make certain no puddles form anywhere else; it should dry about 24 hours before putting back into service again. The key here is patience: take time to do the job correctly rather than rushing through the process; otherwise, you may end up having problems down the line due to poor quality workmanship now.
Installing Real Tile in an RV: A Step-by-Step Guide
Installing real tile in an RV is a great way to upgrade your interior and add some style. With the necessary components, implements, and directions, you can easily do it on your own.
To begin, follow this step-by-step guide to install tile in your RV and upgrade its interior with style.
1. Choose the Right Tile:
The most important thing when choosing tiles for your RV is weight. Since RVs are limited on space and weight capacity, look for lightweight tiles that won’t put too much strain on your vehicle. You also want to make sure they’re durable enough to withstand wear and tear from everyday use.
2. Ensure a Smooth, Clean, and Level Surface:
Before laying the tiles, ensure the surface is free of dust and debris, and that any bumps or ridges are evened out using a patching compound. If there are any bumps or ridges on the surface, use a patching compound to even them out before laying down the tiles.
3. Lay Down Your Tiles:
Once everything is prepped, start laying down your tiles one at a time using mortar adhesive as needed between each piece of tile for extra stability and durability over time.
Make sure you leave enough room between each piece so that grout can be applied later on without overlapping with other pieces of the tile during the installation process.
4. Grouting & Sealing:
After all of your tiles have been laid down properly with adhesive in place, apply grout along all seams where two pieces meet up against each other using a rubber trowel or float tool depending on what type of grout was used (epoxy vs non epoxy).
Then seal off with an appropriate sealant once finished with the grouting process. This will help protect against water damage while adding additional strength overall structure of the tiled area inside RV itself.
Finally, finish up by cleaning off any excess residue from both the tile and mortar surfaces. Allow 24 hours for drying before placing the furniture back into the newly installed tiled area inside your RV living space.
Frequently Asked Questions
Can you put real tile in an RV shower?
Yes, it is possible to install real tile in an RV shower.
Accurately planning and prepping, as well as having the appropriate equipment and supplies is key to a successful tile installation in an RV shower wall or floor.
First, you need to measure the space carefully so that your tiles will fit properly. Then you’ll need a trowel for spreading adhesive on the wall surface and laying down each tile individually.
After allowing time for drying, grout should be applied between each tile with a rubber float or sponge applicator before being sealed with a sealant designed specifically for bathrooms. With proper installation techniques, real tile can provide lasting beauty in any RV bathroom.
Can you put a tile floor in an RV?
Yes, it is possible to install tile flooring in an RV.
Vinyl plank flooring may well provide the best balance of:
- Weight
- Flexibility to motion
- Durability
- Waterproof
- Beauty
If you opt for more traditional tiles such as granite, marble, or ceramic, just know in a large RV that can create a lot of added weight which WILL affect your fuel economy.
Also for RVs that travel frequently, the motion can cause hard tile to crack over time due to its lack of flexibility.
Do they make flexible grout (which won’t crack in an RV)?
Dunlop Flexible Floor & Wall Grout is a revolutionary product that provides superior flexibility and strength for grouting ceramic, porcelain, and natural stone tiles.
It is a urethane-based grout that does not require sealing and is resistant to staining. It is also easy to use, with no mixing required. The product can be used on floors and walls, indoors or outdoors, in wet or dry areas.
Dunlop Flexible Floor & Wall Grout is available from Dunlop Trade at https://dunloptrade.com/products/flexible-floor-wall-grout but unfortunately, it is not available at places like Home Depot. The product comes in a variety of colors to match any tile color scheme. It can be applied with a standard grout float or trowel and can be cleaned up with water after application.
Dunlop Flexible Floor & Wall Grout provides superior flexibility and strength for grouting ceramic, porcelain, and natural stone tiles. It is easy to use, does not require sealing, and resists staining. This makes it an ideal choice for repairs due to improper underlayment as it is less expensive than replacing the entire floor.
Here we are laying new luxury vinyl tile in this Rv, a new floor can really bring a coach to that new feeling again! pic.twitter.com/OEAeSs9cVq
— Coach Supply Direct (@coachsupplydire) June 20, 2015
Conclusion
With the right tools, materials, and techniques you can create a beautiful finished look that will last for years of camping adventures.
Vinyl tiles or ceramic tiles come in a multitude of colors and patterns, allowing you to customize your RV’s look according to your own style. If done correctly with attention paid to grouting and sealing, using real tile in an RV can be both practical and aesthetically pleasing.
Discover how to make the most of your RV experience with real tile, and explore the best tips for camping with kids. Take advantage of our resources today and start creating unforgettable family memories!
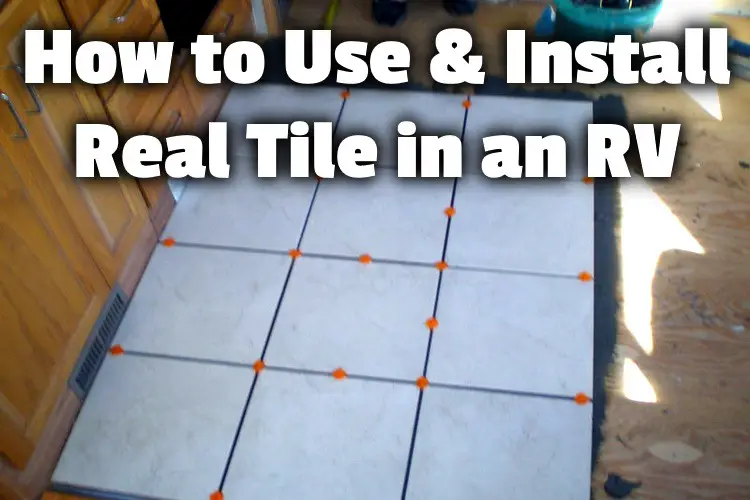
Tile in the kitchen area by Christina Scovel is licensed under CC2.0 and was cropped, edited, and had a text overlay added.
Middle Class Dad is a participant in the Amazon Services LLC Associates Program, an affiliate advertising program designed to provide a means for sites to earn advertising fees by advertising and linking to Amazon.com. As an Amazon Associate, I may earn a small commission from qualifying purchases if you click to Amazon from my site and choose to make a purchase. This is no way increases the cost to you.